Export Images
In G-View there are three options for exporting images:
To save an image from a Viewer as BMP, JPEG or in RAW format, in the menu File click on Export picture as... or right-click on the viewer you want to export an image from, then in the context menu click Export and then click Export picture as.... The following dialogue opens:
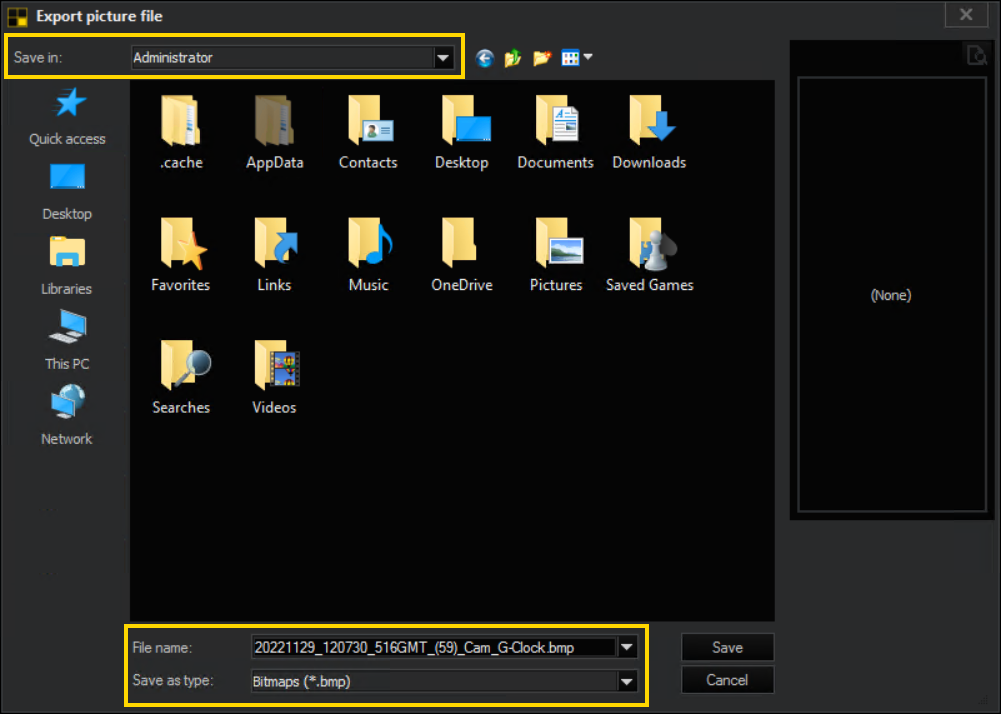
Select a file in where you want to save the image.
The format can be selected under Save as type. Available are:
- BMP
- JPEG (low, medium or high quality)
- RAW
RAW
If RAW format is selected, the image is saved in a file, unchanged. For viewer displays under the JPEG function packet and for IP cameras, a JPEG file is easily created.
BMP and JPEG
For BMP and JPEG formats, the Export picture options dialogue is opened now: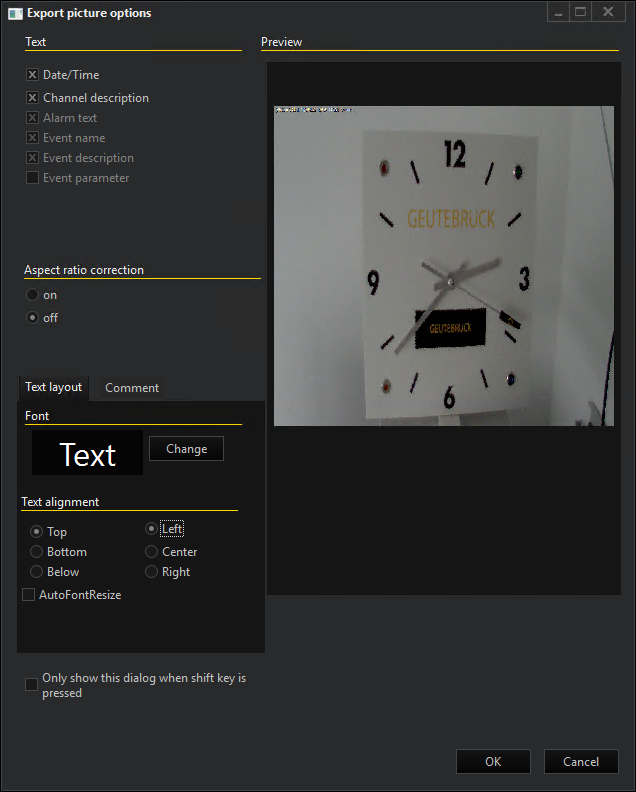
In this dialog, texts describing e.g. the camera channel or the date and time of the image can be inserted into the image. All settings can be verified immediately via a simple preview on the right. When you are done, confirm your choice by clicking on OK.
Available for adding are:
|
Text |
|
|---|---|
|
Date/time |
Date and time of the saved pictures. |
|
Channel description |
Naming of the channel |
|
Alarm text |
Alarm text (where applicable) |
|
Event name |
Event names (where applicable) |
|
Event description |
Event description (where applicable) |
|
Event parameter |
Event parameter (where applicable) |
Text Layout
The font and font-size are determined with a click on Change. For text alignment the following options are available:
|
Text alignment |
||
|---|---|---|
|
Top |
Left |
|
|
Bottom |
Center |
|
|
Below |
Right |
|
Comment
To add an individual comment to the text on the image, write it in the text field under Comment. The comment will be added to the text.
Other
If the option Only show this dialog when Shift key is down has been set, then the Export picture options dialog will be skipped on the next export and the last selected options will be used. The dialogue is only shown again if the shift key is held down on calling up Export, or when the menu option View -> Export -> Show Export options is chosen again.
The printing of an image can be managed via the menu File -> Print picture ... or via the viewer context menu Export -> Print picture ....
The Export picture options dialog will open. In this dialog, texts describing e.g. the camera channel or the date and time of the image can be inserted into the image. All settings can be verified immediately via a simple preview on the right. When you are done, confirm your choice by clicking on OK.
The settings are saved and are preset for the next export.
If the option Only show this dialog when Shift key is down has been set, then this dialog is skipped and the last chosen options are used the next time printing an image.
The dialogue is only shown again if the shift key is held down on calling up Export, or when the menu option View -> Export -> Show Export options is chosen again.
Opening the option dialogue can also be suppressed if the user chooses the right-click menu Export -> Show Print Options.
Edit Page
With Edit page, the page can be edited before printing.
Here, texts can be added or cleared. In addition, the font, the font size, color and alignment can be changed. Additional pictures can also be added.
On leaving the editor, after an inquiry the changes are applied.
You can also copy the viewer image for editing, for example, via the menu File -> Snapshot to clipboard, or via the viewer context menu Export -> Snapshot to clipboard.
The image is then copied to the clipboard without adding any text and can be saved in other applications as a bitmap from there.
If the shift key is pressed in during the menu selection, the operations dialog Export pictures options opens. The settings are similar those in BMP and JPEG